The good news: My fridge has never looked better, and my kids can actually find what they’re looking for in it. The bad news: I’ve been spending a little too much time browsing Pinterest…
SUPPLIES
1. Clean it out.
- I started by clearing out my fridge. I literally took everything out of there although I have to admit it added a little bit of stress because of the time pressure. You can do this shelf by shelf so stuff doesn’t go bad while you clean, or you could just use a cooler for the super perishable stuff. I tossed expired items. Yes, condiments can go bad! I also tossed stuff I knew I would never use. Then I gave my shelves a good wash so I’d have a clean canvas.
2. Create homes.
- I did a little research and it turns out there are actually designated places for certain foods:
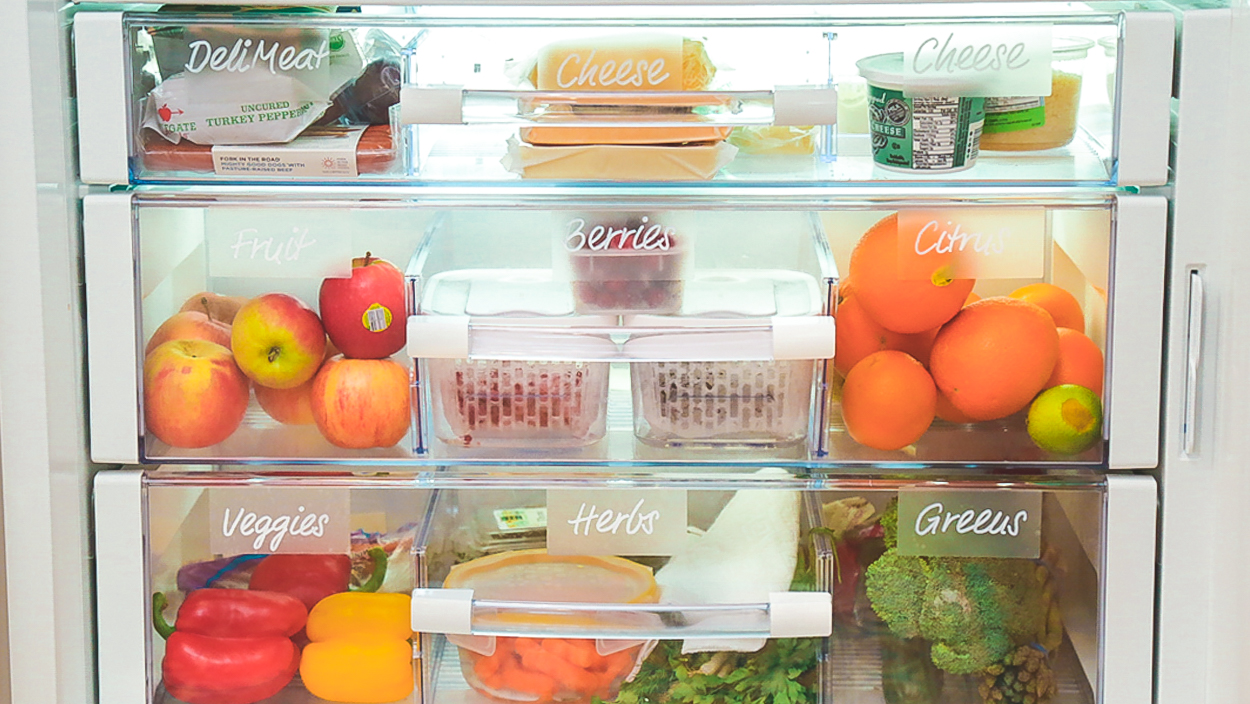
- Milk shouldn’t be stored in the fridge door because the door is most susceptible to temperature fluctuation and you want your milk to stay cold. So I put mine on the bottom shelf (cold air sinks!) and that way the kids can help themselves.
- Fruit and veggies should go in drawers where the humidity is usually higher and you want to keep them separate because they produce different gases that can spoil your produce faster.
- Meats would ideally be stored separately in a bottom drawer, but I wanted a full veggie drawer so I put any meat in a self-contained bin to avoid contamination and stuck it up high where the kids couldn’t reach it. I adjusted shelves as needed and I moved one shelf just to fit the ketchup so the kids could grab it.
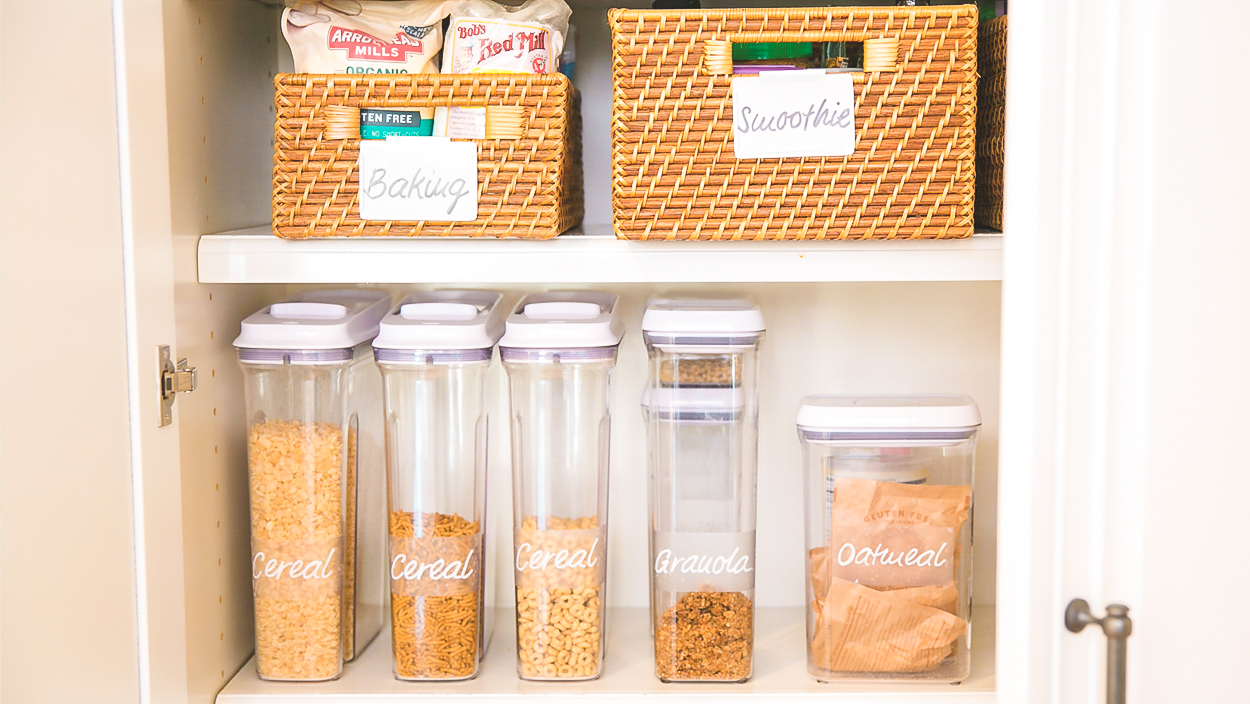
- I also keep things like string cheese and yogurt accessible for the kids to snack on. Smaller plastic bins are great for separating spaces and help to keep things like smoothie ingredients from spilling into different zones.
- Leftovers are now at the top of my fridge in glass containers because everything looks yummier when you can see it! I also keep a dry erase and permanent marker nearby so I can mark things like eggs and leftovers with dates.
3. Label!
- Honestly, this step will make or break your success. I wanted my fridge to look Pinterest worthy so I printed titles in a pretty font, placed clear shipping labels on top and traced over the titles with a white paint pen. It came out so cute and professional looking and when things look nice I’m motivated to keep them going. You can’t expect everyone in your house to know your new system but if it’s labeled there are no excuses.