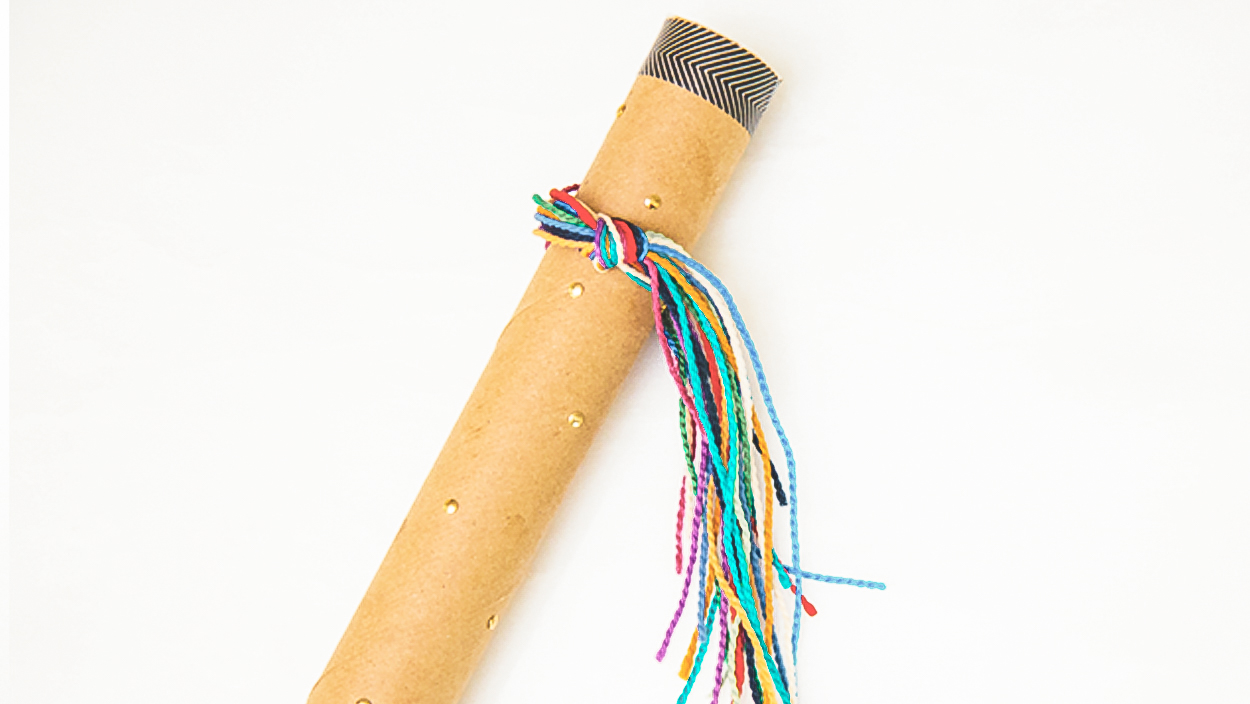
A handmade rain stick might not be at the top of your to-do list, but this is one kid-friendly DIY you must try! We’ll show you how to make a rainstick. It’s so much fun, and it may quickly became a playroom staple.
WHAT YOU’LL NEED
- Cardboard tube
- Craft nails
- Funnel
- Hammer
- Clear packing tape
- Rice or beans
- OPTIONAL: washi tape and embroidery thread
QUICK RECAP
Start by taping off the bottom of the stick with clear packing tape. Then, place the first nail toward the end of the tube and hammer it in. Rotate the tube a ¼ of a turn, and place nail ½” – 1” below the top nail, continuing this process all the way down the stick. Next, pour the rice and beans (your “rain”) through a funnel into your tube. Once everything is secure in the tube, tape off the open end.
Optional: add washi tape to each end to give it a clean edge, and tie some embroidery thread for a pop of color.
It is so fun to experiment with different objects to create different sounds. This was a blast and such a cool addition to our instrument collection!